
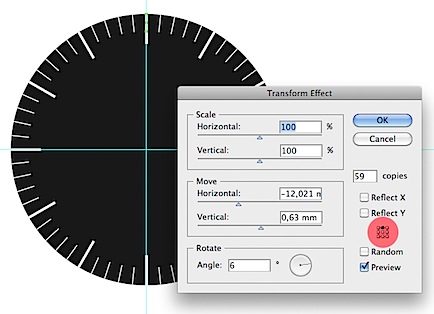
Then go again to Effects > Distort & Transform > Transform and set Copies to 59 , Angle to 6° , Horizontal movement to -12,021 mm and Vertical movement to 0,630 mm . 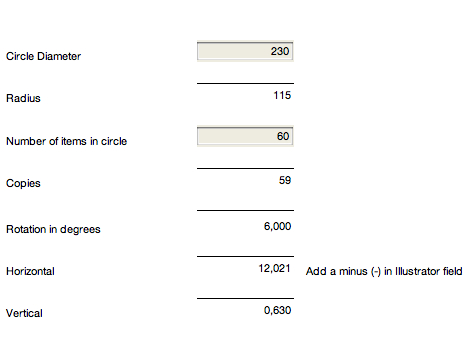
 Note that the Reference Point Locator (in the red) has to be on top because the top of the box aligns with the edge of the circle. … Make a gradient with three color stops, gray to white, using these values: R 255, G 255, B 255 R 172, G 172, B 172 R 83, G 83, B 83 .
 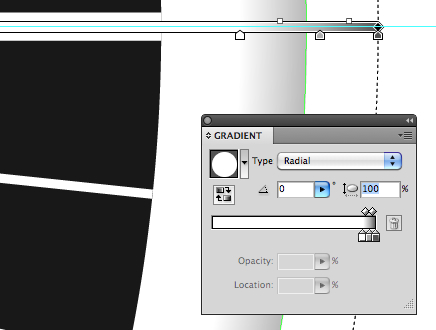 Grab the center of the Gradient Annotator and move it 2 mm to right and 2 mm up.
Draw a Braun watch in Illustrator

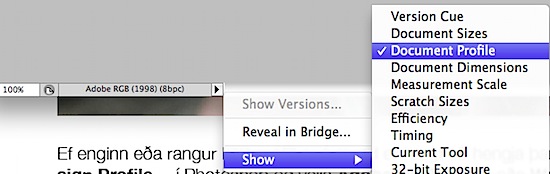 If no or wrong ICC profile is attached to a picture you can correct that in two ways in Photoshop: Go to Edit > Assign Profile… and choose the right one. … The RGB workflow allows CMYK pictures to be used to, but in that case you have to color manage those pictures and use the appropriate CMYK profile to color correct the pictures according to the paper which is going to be used for the printing.
 I recently wrote my first guest-blog, called Prepress Tips for Graphic Designers on David Airey’s blog . … But at least there is fun involved and at blogs that size (16.000 readers) there are more comments to deal with and lively discussions.