On the English keyboard it are the bracket keys [ ] which take care of the size and the curly brackets change the hardness, that is, use the bracket keys and add the Shift key to the combination. … In my opinion the far best way to control the brush size however is to hold down the Control and Alt keys on the mac and push down the mouse button.
adobe
Draw a Braun watch in Illustrator
Then go again to Effects > Distort & Transform > Transform and set Copies to 59 , Angle to 6° , Horizontal movement to -12,021 mm and Vertical movement to 0,630 mm . 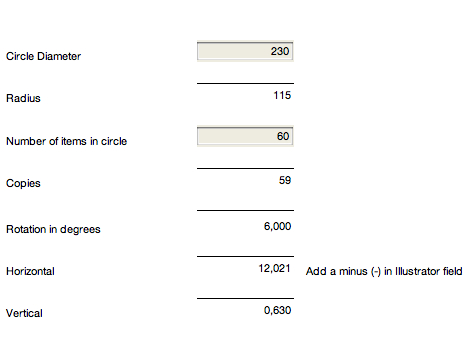
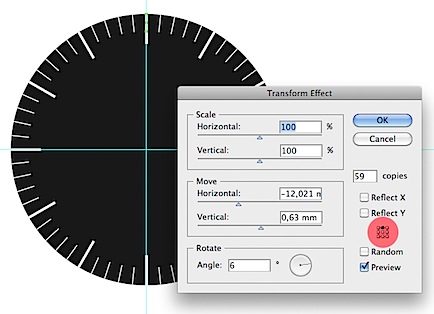 Note that the Reference Point Locator (in the red) has to be on top because the top of the box aligns with the edge of the circle. … Make a gradient with three color stops, gray to white, using these values: R 255, G 255, B 255 R 172, G 172, B 172 R 83, G 83, B 83 .
 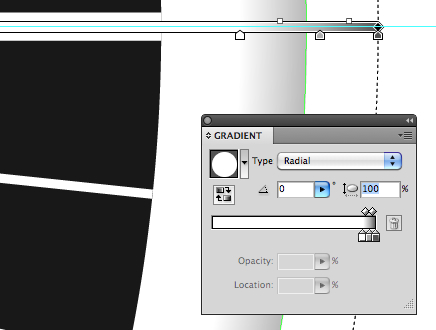 Grab the center of the Gradient Annotator and move it 2 mm to right and 2 mm up.
Calculate multiple objects in a circle in Illustrator
And to make this a bit more complicated, maybe you want to be able to edit those objects after you have placed them in a circle without having to do everything over again if you need to change. … All you have to do is to fill in the diameter of the circle and the number of objects that you want on the circle and you get the Horizontal and Vertical values you need to fill in to make everything fit. 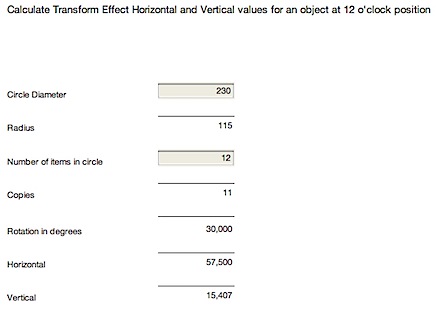 I am not sure if anyone cares to know the math behind this calculator but here is a picture which I used when I was figuring this out.
Making seamless patterns in Illustrator
Then make them Global by double clicking each color and check the Global checkmark in the dialog box that opens. 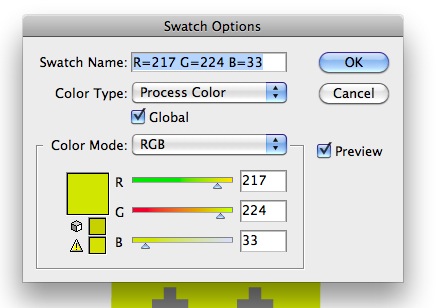 You can also start by making a few boxes to match your colors and when you are satisfied you can make a Color Group by clicking the Color Group icon at the bottom of the Swatch panel. … First select the object in the upper left corner and drag the Appearance icon of the object to the Graphic Style panel.
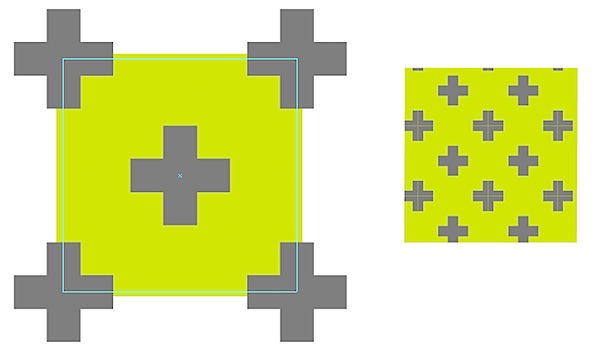
 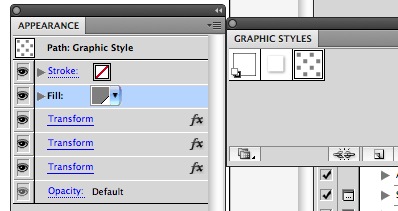 Now, placing any object over a 60 by 60 mm square and applying the Graphic style it will add the same effect to that object.
Contact Sheets in PDF in Bridge replace the older InDesign plug-in
For those who have been using different workspaces and even making their own customized workspaces in other CS applications will note that this Output workspace of Bridge brings features that are not available in the other workspaces. … Secondly, if you still want to use your own InDesign templates to make contact sheets you can buy a script for $30 from Creadtive Scripting I have not tried it myself but I have seen great reviews online from the InDesign dudes and dudettes.
Illustrator Keyboard Shortcuts for Foreign Languages
One good thing to remember is that this Set file can be found on the mac in ~/User/Preferences/Adobe Illustrator CS4 Settings/En_US (The En_US may be different for countries). … (If you are using CS3 or older you will get a yellow triangle saying that this already in use by Apply Last Filter command.
Grid Systems : Calculate grids for layouts in InDesign with the help of the Easy Grid Calculator
Set Left to 3 units and you will see from the Closest match that now we only need only to add one more unit to the Margins. … In the case when you want to use greater leading, smaller page size or even more columns and rows you will find it harder to make things fit.
Love relationship between Illustrator and FontLab broken with CS5
In the article Using Illustrator to draw fonts for importing into FontLab , which I wrote several years ago, I describe how nice it is to use Illustrator and FontLab together. … The only workaround I can think of so far is to make little box (let’s say 10×10 pt) within the glyph slot along with the glyph, position it on the 0.0 point corner and copy it over to Illustrator along with the glyph.
How to make a circle color spectrum in Illustrator
You could also do all this by clicking with the mouse on the center of the guide lines to get a dialog box to fill in the measurements but I thought it would be worth it to show you both methods. 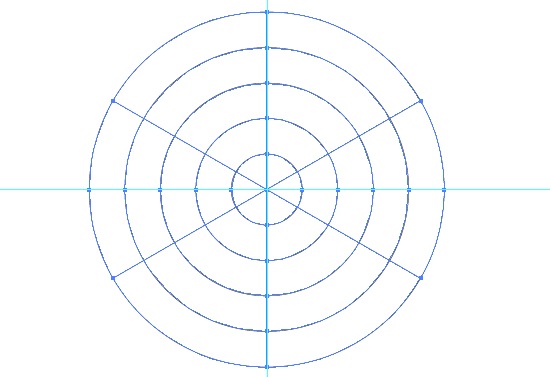 Select the grid and make it to guides with Command + 5 or go the long way via the View menu down to Guides and to Make Guides in the sub menu. … The first division is there.
  Then click approximately into the center of the top edge.
  And after that add two vertical dividers on each half so we have six sections in total horizontally.
  Using the Direct Selection Tool, (the white arrow) select all the anchor points, except those who align with the circle.
Close your fonts to fix Illustrator freeze, crash and sluggishness
That means what even if you delete font sets (a set of aliases/links to the fonts) the correct fonts will open in Illustrator when it calls for it even if you closed all your fonts to start with. … I hope this persuades you to let go and close all your fonts when Illustrator is really acting up because this is fast, no risk and you don’t have to be a tech geek to do this.
