
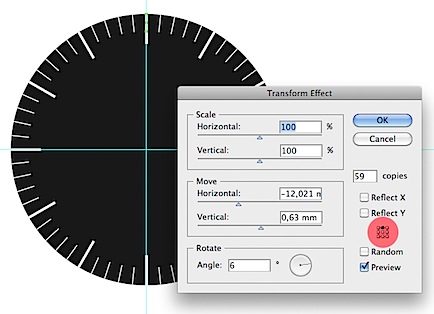
Then go again to Effects > Distort & Transform > Transform and set Copies to 59 , Angle to 6° , Horizontal movement to -12,021 mm and Vertical movement to 0,630 mm . 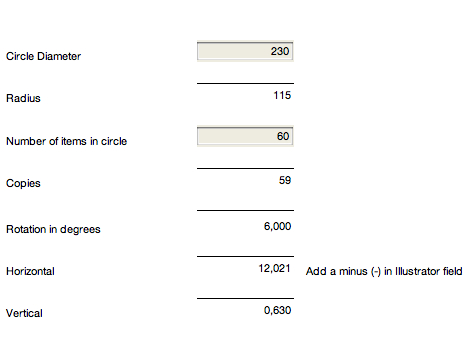
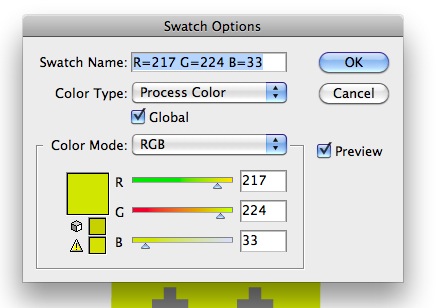
 Note that the Reference Point Locator (in the red) has to be on top because the top of the box aligns with the edge of the circle. … Make a gradient with three color stops, gray to white, using these values: R 255, G 255, B 255 R 172, G 172, B 172 R 83, G 83, B 83 .
 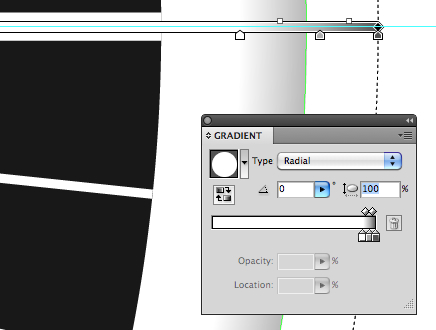 Grab the center of the Gradient Annotator and move it 2 mm to right and 2 mm up.
Draw a Braun watch in Illustrator

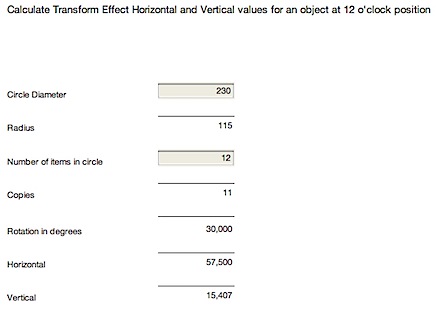 I am not sure if anyone cares to know the math behind this calculator but here is a picture which I used when I was figuring this out.
 You can also start by making a few boxes to match your colors and when you are satisfied you can make a Color Group by clicking the Color Group icon at the bottom of the Swatch panel. … First select the object in the upper left corner and drag the Appearance icon of the object to the Graphic Style panel.
 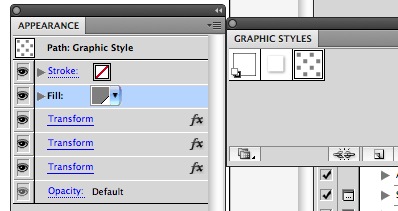 Now, placing any object over a 60 by 60 mm square and applying the Graphic style it will add the same effect to that object.
 The problem however is that QuickLook does not have a character table for Icelandic, but the English one is used, leaving out those glyphs I am after. … The character sets are are kept in a file called SampleSupport.plist which is found at: /System/Library/Frameworks/ApplicationServices.framework/Versions/A/Frameworks/CoreText.framework/Versions/A Copy this path and in Finder go: Command + Shift + G and paste the path into the field and you will instantly brought to the right place.
 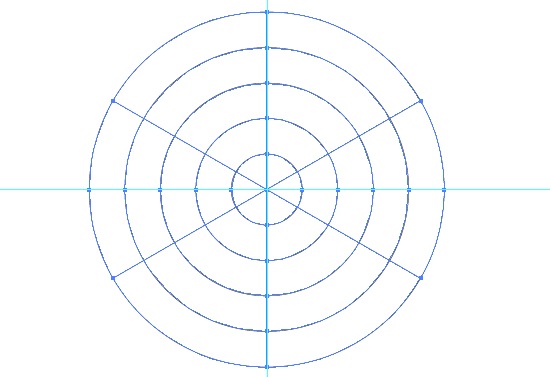 Select the grid and make it to guides with Command + 5 or go the long way via the View menu down to Guides and to Make Guides in the sub menu. … The first division is there.
 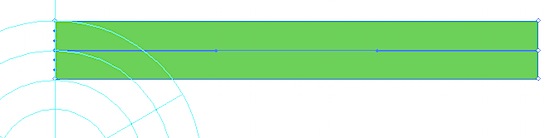 Then click approximately into the center of the top edge.
 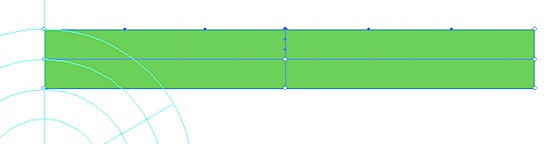 And after that add two vertical dividers on each half so we have six sections in total horizontally.
 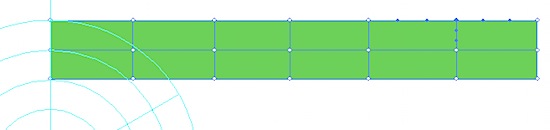 Using the Direct Selection Tool, (the white arrow) select all the anchor points, except those who align with the circle.
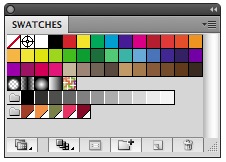 This results in a new Color Group , where the selected colors are grouped together inside the Swatches panel.
 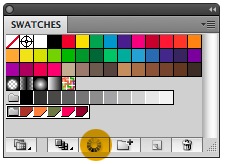 Select the Color Group inside the Swatches panel. … The Pantone Swatch Libraries are under Color Books and as an example choose: Pantone solid coated and let go.
 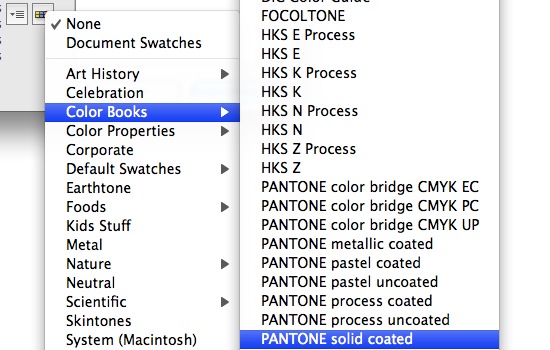 Now watch the difference we have here: Over the button we just released it says: PANTONE solid coated and in the upper left corner you see that a dot has been added to the white triangle , meaning that we now have changed the Color Group to spot colors, which Pantone colors are .
 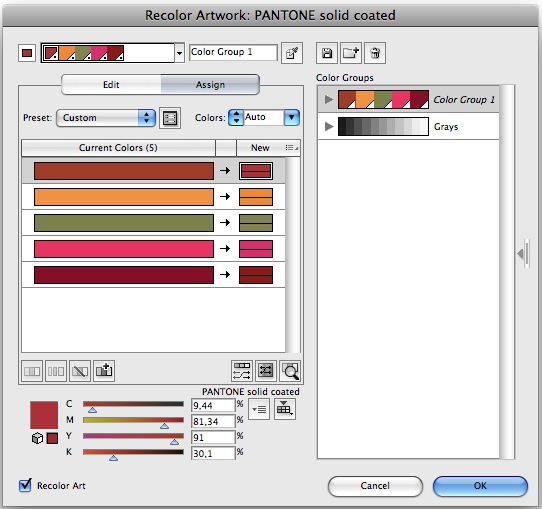 Before you click OK be sure that Recolor Art is checked.
 On the other hand Adobe Illustrator which is a one-page program (although CS4 has multiple artboards) has some other tools that are just as great in its own way, tools that can really speed up the making of the grids. … Do the same with the horizontal guides using 210 mm for the width and turn them also into guides.
  When you make your next grid, after this tutorial you might consider if it suits you better to keep the lines in their green color and not to make them into Illustrator guides, but at least you should move them into their own Layer.